


Here is a very brief outline of some of the capabilities of our Accounts-Receivable application:
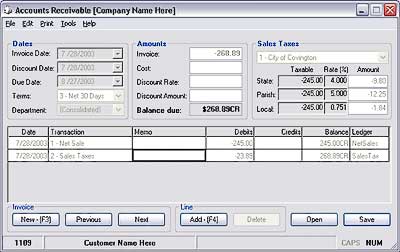 This is the main window for Accounts Receivable, the one that comes up
when you launch the application. It's essentially an electronic form of the old ledger card system with one "card" for
each customer invoice.
The top of the window shows the dates, subtotals, taxes and other information. Below that is a grid with one row for each invoice detail: the original net sale, sales taxes, discounts, payments, and all the other transactions that have occured.
You can edit all of these as if they were on a spreadsheet. Changing one value will adjust all the relavent others. You can drag the window as large as you like. All the invoice information is right there.
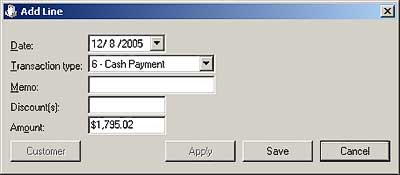 To post a payment to a single invoice,
you can retrieve it to the screen, click Add or press F3 or select Edit>Add Line, and the application
will open a window like this.
The routine assume you are entering a payment and will fill in the unpaid balance for the invoice for you and put the highlight on "Memo". Most of our customers enter the check number there. Just click Save to save the payment.
If the invoice has a credit balance, the routine will default to "Adjustment" as the transaction type, and the amount will be the credit balance for the invoice.
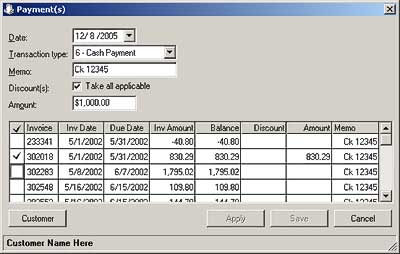 Again, you can enter a memo, such as the check number, and the amount
of the check. When you click Apply, you will see a window like this:
These are all the open (unpaid) invoices for this customer. Now, all you need to do is check off the ones to which you want to apply the check payment. Just double-click the left-most box on each line -- or move the highlight to that line and press the Spacebar. The highlight starts on the top (oldest) line, so normally you can just press Spacebar once for each line. (The highlight automatically advances to the next line.) Each time you select an unpaid invoice, the routine automatically enters the unpaid balance for that invoice, until you have applied the total check amount. If you don't want to apply the payment to the entire balance, you can change it there in the grid.
Usually, applying one check to many invoices can mean entering the check amount, pressing the Spacebar several times (once for each unpaid invoice), and clicking Save. How's that for simple?
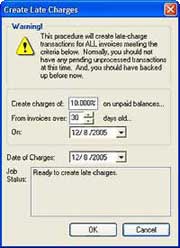 You can automatically create late charges
based on the unpaid balances of customer invoices.
Of course, you can turn this on and off for specific customers and as a default for the whole system.
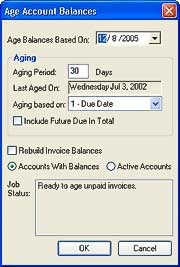 You have complete control over the balance
aging process.
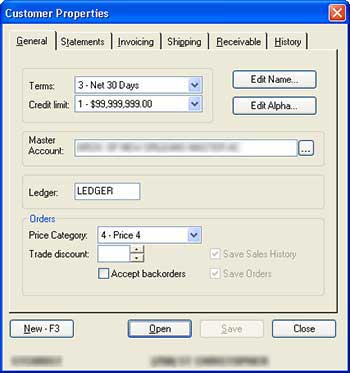 At pretty much any point, you can press
F9 and review the data for the current customer.
As you can see, this is a standard Windows properties window, with separate tabs for each group of information related to a customer.
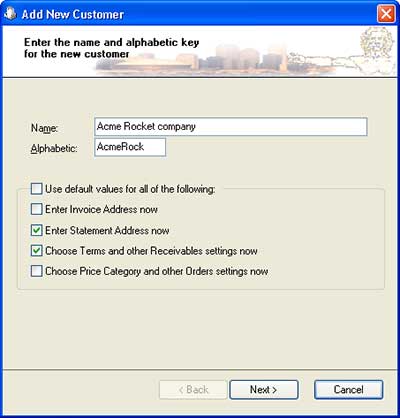
You can customize it so that creating a new customers can be as easy as pressing F3 (to start the wizard), keying in the customer name, and pressing Enter twice. Or you can have the wizard prompt you for specific information, checking as it goes to insure accuracy.
 Click here for more on
the wizard for adding new customers.
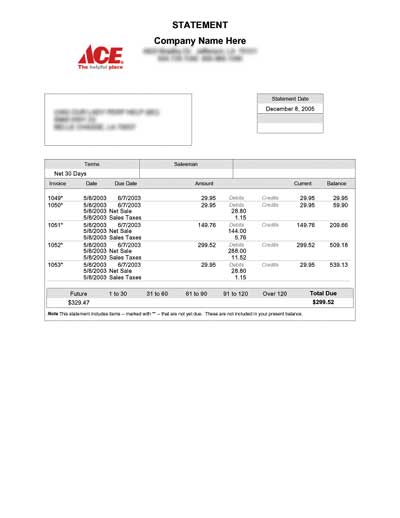 Here is a typical customer statement.

Note how it includes the company logo and is virtually typeset, eliminating pre-printed forms. We can pretty much duplicate any form you have.