


 Orders Point of Sale Receivables Inventory Control Purchase Orders CheckWriter Payroll General Ledger
Purchase Orders -- a database of inventory items, on vendor orders, that feeds invoices for received items into...
Accounts Payable -- files of open vendor invoices, from which you can select for payment (insuring you take all available discounts), that feed...
CheckWriter -- checks awaiting printing on your check forms.
With this approach our customers can go into as much detail and variation as they want, without any extra steps, and with extra security.
Here is a very brief outline of some of the capabilities of our Accounts Payable application:
 We're on the threshold between versions of our general-purpose applications, and these pages describing them are incomplete --
in some cases very!
We're on the threshold between versions of our general-purpose applications, and these pages describing them are incomplete --
in some cases very!
We're working on this, so please check back, or -- even better -- please contact us!
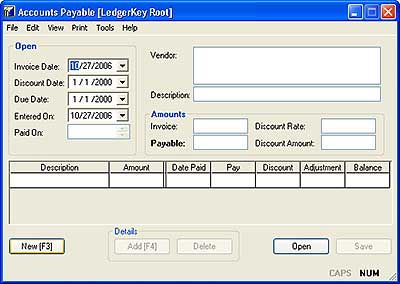 Here's the initial screen that comes up after launching our
Accounts-Payable application.
Here's the initial screen that comes up after launching our
Accounts-Payable application.
At the top are the key pieces of payable information, amounts, due and discount dates.
The grid in the middle of the window allows you to break out the invoice details, such as for general-ledger accounting and so that you can pay only certain items or groups of items from the invoice. There are an unlimited number of detail lines, so you can actually show individual items if you like.
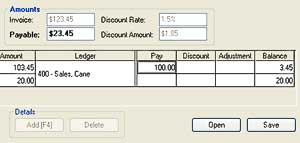
Or, you can choose View>Pay Amount to reveal the payment column for the invoice and enter any amount for any line.
[Copy here]
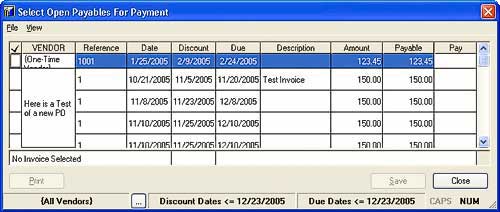 The application will open a window showing you a group of open payables like this.
The default criteria for which invoices are included are "all vendors" and cutoff discount and due dates. (You can change these as application settings.) You can look at individual vendors. You can change the range of cutoff dates.
You can just move the highlight up and down the list and press Spacebar or F7 or choose File>Select This Invoice to select (or deselect) individual invoices. Or you can press F3 (or choose File>Select All from the keyboard) to select all the invoices in the group. You can select and deselect all the invoices for a single vendor with F5 and/or F6. Click Save to save your choices.
If you want to partially pay an invoice, just move the highlight to the "Pay" column and enter the amount. (Of course, when you select an invoice, the application fills in the open balance.)
This gives a very visual method to easily browse through open payables and mark invoices for payment.
Or you can choose File>List Selected Invoices/Vouchers) from the main window.
It's always a good idea to print a hard copy of what you are about to process, but that is optional.
 Finally, you process invoices for payment
by choosing File>Process (or pressing Ctrl+F8).
Finally, you process invoices for payment
by choosing File>Process (or pressing Ctrl+F8).
"Processing" means two things here: Passing payment information to our CheckWriter module (to create a vendor check) and marking the invoice, either partially or fully, as "paid"; and, if you are using our applications to handle your general-ledger work, creating groups of journal entries in the general-ledger database.
You just check of the groups of invoices -- or individual invoices -- and (optionally) specify a couple of criteria for the ledger work, and that it! Ths literally takes only a few seconds.
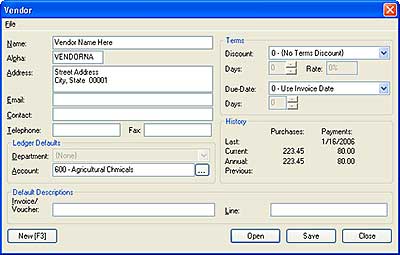 At pretty much any point, you can press
F9 and review the data for the current vendor.
At pretty much any point, you can press
F9 and review the data for the current vendor.
All the reference information is right there in front of you.
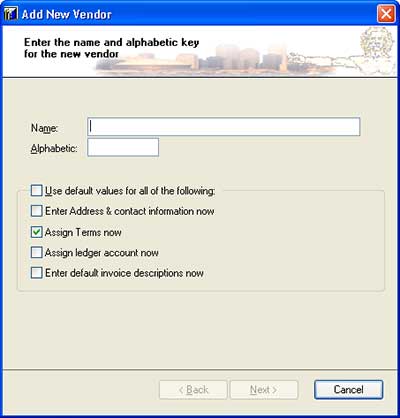
You can customize it so that creating a new vendors can be as easy as pressing F3 (to start the wizard), keying in the vendor name, and pressing Enter twice. Or you can have the wizard prompt you for specific information, checking as it goes to insure accuracy.
Click here for more on
how these wizards work.